Pytorchのチュートリアルにflaskと連携するものがありました。
とても実践的なサンプルだね〜
Pytorchのチュートリアルを久しぶりに散策していたら、flaskを利用してPytorchの機能を実装していくというチュートリアルを見つけました。ということで、このチュートリアルをやっていきたいと思います。まずは、結構ファイル構成などが複雑なので、細かい説明は後日見ていくとして、アプリとして動作するかを試してみました。

こんな人の役に立つかも
・機械学習のWebアプリを作成したい人
・Pytorchアプリをflaskで動作させたい人
・Pytorchのチュートリアルをやっている人
動作させるアプリの概要
特定のURLに画像と一緒にリクエスト送信をすることで、json形式の分類結果が帰ってくるようなWebアプリケーションです。
分類器としては、すでに学習済みのDenseNet121というものをtorchvisionモジュールから読みこんで利用します。1000クラス分類を行うことができます。(1000個のクラスのラベルは、index_to_name.jsonファイルで確認することができます。
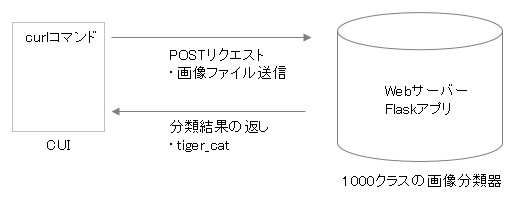
今回、クライアントはCUIでリクエストを出す感じなんですね。
flaskアプリを動かす
チュートリアルを進めていくと、最初に詳細な説明が始まりますので、まずはアプリが動作するために必要な手順をまとめました。動作する前提で詳細のプログラムをみていくほうが安心して勉強できます。
git cloneでプログラムを取得
まずは、作業用のディレクトリを作成しておきます。私は普段Pythonプログラムをホームディレクトリ直下のPythonというフォルダに入れていますので、そこに移動して「Pytorch_flask」というフォルダを作成しました。任意のフォルダを作成してください。
$ cd Python
$ mkdir Pytorch_flask
$ cd Pytorch_flask
チュートリアルの通り、gitでリモートリポジトリから一連のファイルを取得してきます。
そして、カレントディレクトリに「kitten.jpg」と「index_to_name.json」というファイルをコピーしておきます。
mac
$ git clone https://github.com/pytorch/serve
$ cp serve/examples/image_classifier/kitten.jpg .
$ cp serve/examples/image_classifier/index_to_name.json .
windows
> git clone https://github.com/pytorch/serve
> copy serve\examples\image_classifier\kitten.jpg .
> copy serve\examples\image_classifier\index_to_name.json .
「kitten.jpg」はかわいらしい猫の写真です。この画像をWebアプリ(torchvisionのImageNet1000クラス分類器)で分類します。「index_to_name.json」は、分類クラスのラベルが記載されています。
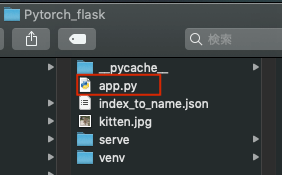
「app.py」の作成
「Pytorch_flask」階層に次のように「app.py」を作成して、チュートリアルのプログラムをコピペしておきます。
↓app.pyの内容です。
import io
import json
import os

import torchvision.models as models
import torchvision.transforms as transforms
from PIL import Image
from flask import Flask, jsonify, request

app = Flask(__name__)
model = models.densenet121(pretrained=True)               # Trained on 1000 classes from ImageNet
model.eval()                                              # Turns off autograd and

img_class_map = None
mapping_file_path = 'index_to_name.json'                  # Human-readable names for Imagenet classes
if os.path.isfile(mapping_file_path):
    with open (mapping_file_path) as f:
        img_class_map = json.load(f)

# Transform input into the form our model expects
def transform_image(infile):
    input_transforms = [transforms.Resize(255),           # We use multiple TorchVision transforms to ready the image
        transforms.CenterCrop(224),
        transforms.ToTensor(),
        transforms.Normalize([0.485, 0.456, 0.406],       # Standard normalization for ImageNet model input
            [0.229, 0.224, 0.225])]
    my_transforms = transforms.Compose(input_transforms)
    image = Image.open(infile)                            # Open the image file
    timg = my_transforms(image)                           # Transform PIL image to appropriately-shaped PyTorch tensor
    timg.unsqueeze_(0)                                    # PyTorch models expect batched input; create a batch of 1
    return timg

# Get a prediction
def get_prediction(input_tensor):
    outputs = model.forward(input_tensor)                 # Get likelihoods for all ImageNet classes
    _, y_hat = outputs.max(1)                             # Extract the most likely class
    prediction = y_hat.item()                             # Extract the int value from the PyTorch tensor
    return prediction

# Make the prediction human-readable
def render_prediction(prediction_idx):
    stridx = str(prediction_idx)
    class_name = 'Unknown'
    if img_class_map is not None:
        if stridx in img_class_map is not None:
            class_name = img_class_map[stridx][1]
    return prediction_idx, class_name

@app.route('/', methods=['GET'])
def root():
    return jsonify({'msg' : 'Try POSTing to the /predict endpoint with an RGB image attachment'})

@app.route('/predict', methods=['POST'])
def predict():
    if request.method == 'POST':
        file = request.files['file']
        if file is not None:
            input_tensor = transform_image(file)
            prediction_idx = get_prediction(input_tensor)
            class_id, class_name = render_prediction(prediction_idx)
            return jsonify({'class_id': class_id, 'class_name': class_name})

if __name__ == '__main__':
    app.run()
Python仮想環境を入れましょう
Pytorchチュートリアルでは、そのままアプリを実行していますが、flaskをインストールしたりするので、仮想環境を準備してその中でアプリを実行させます。
mac
$ cd Pytorch_flask
$ python3 -m venv venv
$ . venv/bin/activate
windows
> cd Pytorch_flask
> py -3 -m venv venv
> venv\Scripts\activate
Python仮想環境が準備できたら、次のコマンドでFlaskのデバッグ用Webサーバーを立ち上げて実行します。(flaskアプリはlocalhost:5000でアクセスできます。)
mac
(venv)$ FLASK_APP=app.py flask runwindows
macではFLASK_APPで自動的にFLASKがダウンロードされたっぽいですが、windowsでは次のようにpipして、setする一連の順序でないと駄目なようです。
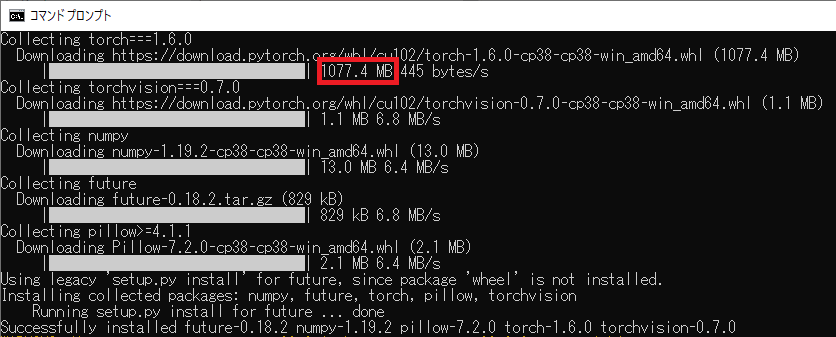
pytorchのpipでのインストールは公式サイトのこのページで、pipの部分をクリックすると、すぐ下にコマンドがでてきました。ダウンロードに少し時間がかかります。
(venv)> pip install Flask
(venv)> pip install torch===1.6.0 torchvision===0.7.0 -f https://download.pytorch.org/whl/torch_stable.html
(venv)> set FLASK_APP=app.py
(venv)> flask run
curlコマンドで検証
新しくターミナルを立ち上げて、curlコマンドでPOSTリクエストを送信します。
まずは、新しいターミナルウィンドウ(または、コマンドプロンプト)を立ち上げて、階層を移動しておきます。そして、curlでlocalhost:5000にPOSTリクエストを送信しましょう。(windosも同様のコマンドです。)
$ cd Pytorch_flask/
$ curl -X POST -H "multipart/form-data" http://localhost:5000/predict -F "file=@kitten.jpg"
curlコマンドに対して、次のようなデータが返ってきます。
{"class_id":282,"class_name":"tiger_cat"}準備した画像で検証
PhotoACから次のトラの画像をダウンロードしました。
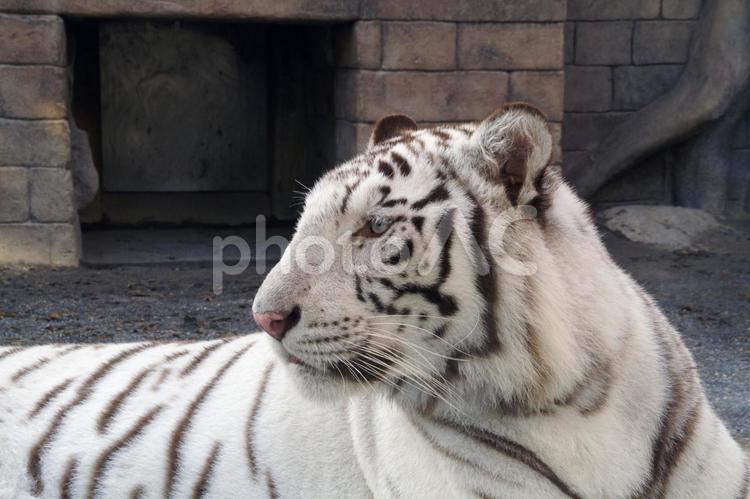
smallサイズは無料会員登録で自由にダウンロード、利用ができますので、お得です。
ダウンロードした画像ファイル名を「tiger.jpg」としまして、「Python\Pytorch_flask」階層に配置しました。
次のコマンドでPOSTリクエストを投げてみます。
curl -X POST -H "multipart/form-data" http://localhost:5000/predict -F "file=@tiger.jpg"次の答えが返ってきました。
{"class_id":292,"class_name":"tiger"}ちゃんと分類結果でトラが返ってきました。
いろいろな画像試すのも面白いね~